

How To Make A Live Photo Your Wallpaper
How To Make A Live Photo Your Wallpaper
 Source: Christine Romero-Chan / iMore
Live Photos aren't quiiiite video, but rather a full-on 12-megapixel photo that animates 1.5 seconds of motion before and after the still. Super cool, right? Yeah, we thought so. You can take them with any of the best iPhones from the iPhone 6s to iPhone 12 series, as well as iPad Pro, as long as they are on iOS 9 or later. Live Photos are also supported for viewing on Apple Watch Series 2 or later, and Macs that are running El Capitan or later.
How to take a Live Photo with your iPhone or iPad
Live Photo can easily be turned on and left on, or turned off and only turned on when you expressly want to use it — which is a great option if you're looking to save the battery and some space on your iPhone. Since Live Photos (which combine a 12-megapixel JPG image with a ~15FPS MOV file) take about twice the amount of storage, and require you to keep the camera relatively still for three seconds, both your storage and patience might lean you towards the latter approach.
The important thing to remember is that a Live Photo is not a movie. It doesn't start when you hit the shutter. Instead, it grabs the photo. Think of it this way — the moment you hit the shutter is the mid-point of your live photo, the still that's wrapped in animation before and after. Grasp that, and your Live Photos will turn out just the way you want them!
- Launch the Camera app from your Home screen.
- Tap the Live Photo button, top center (looks like a set of diffusing rings) to toggle it on (yellow).
-
Tap the Shutter button to take your Live Photo.
 Source: iMore

The Live Photo icon will animate with a brief ripple and a yellow LIVE label will pop up to briefly alert you that it's on. A white LIVE OFF label will briefly alert you when it's not on. Additionally, there is an Auto option for Live Photos on the iPhone 11 series, but you can only access it via a control menu that is accessed by tapping on the arrow at the top of the camera screen.
How to view Live Photos on a newer iPhone model
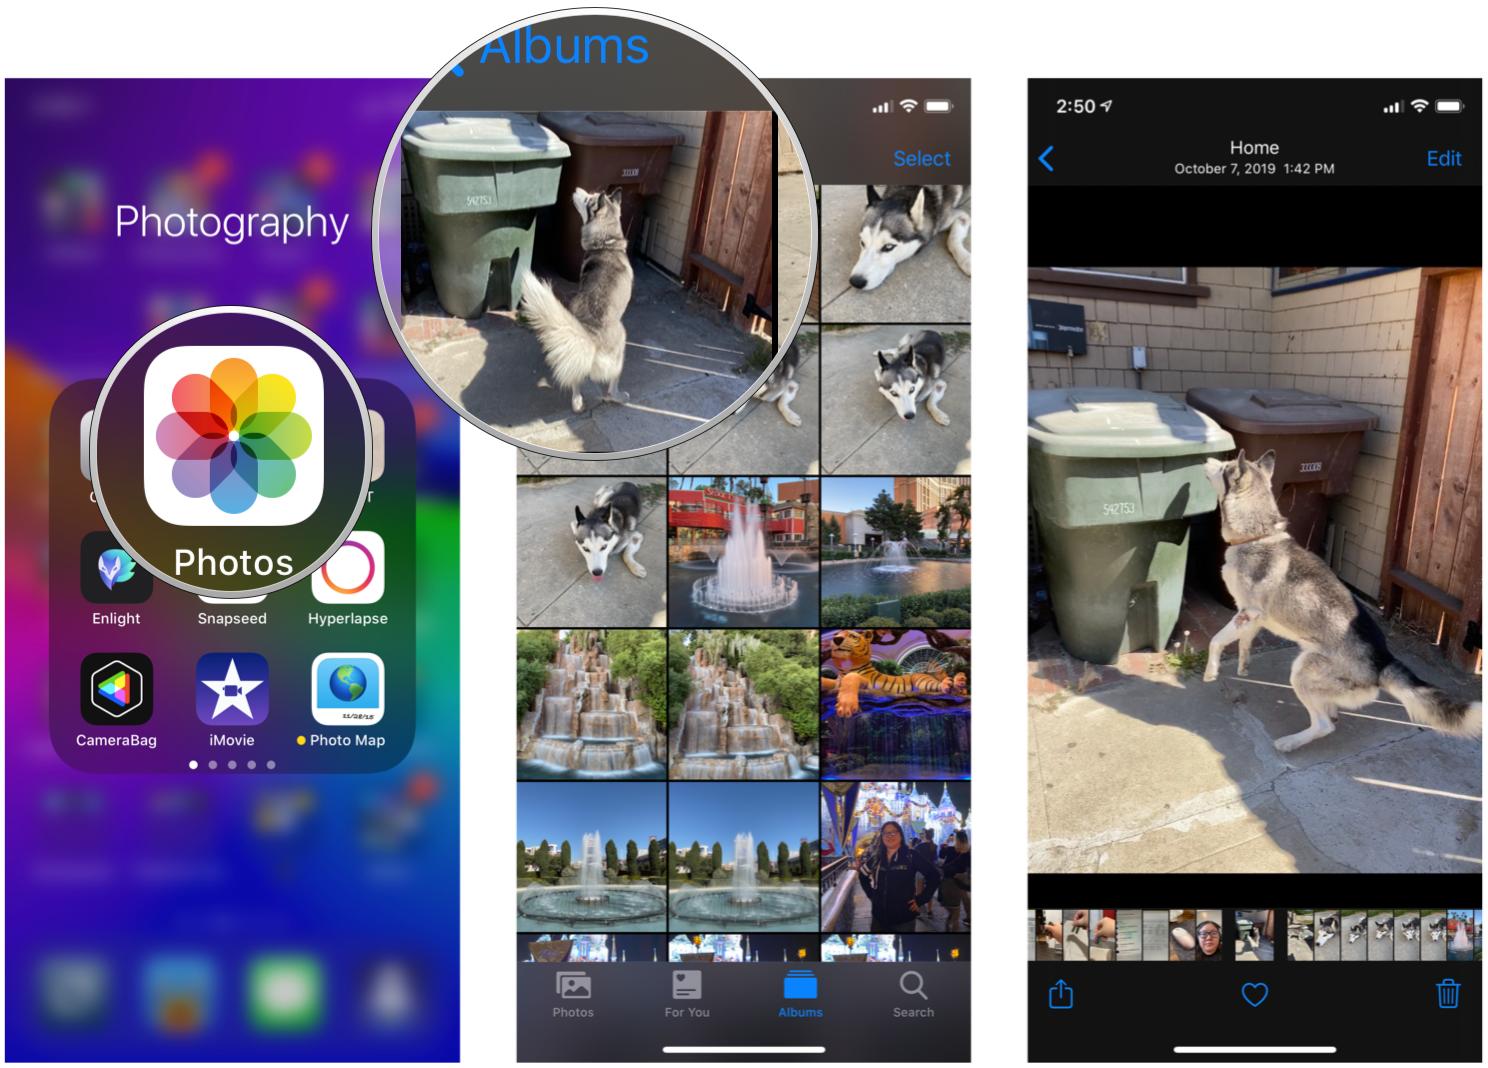
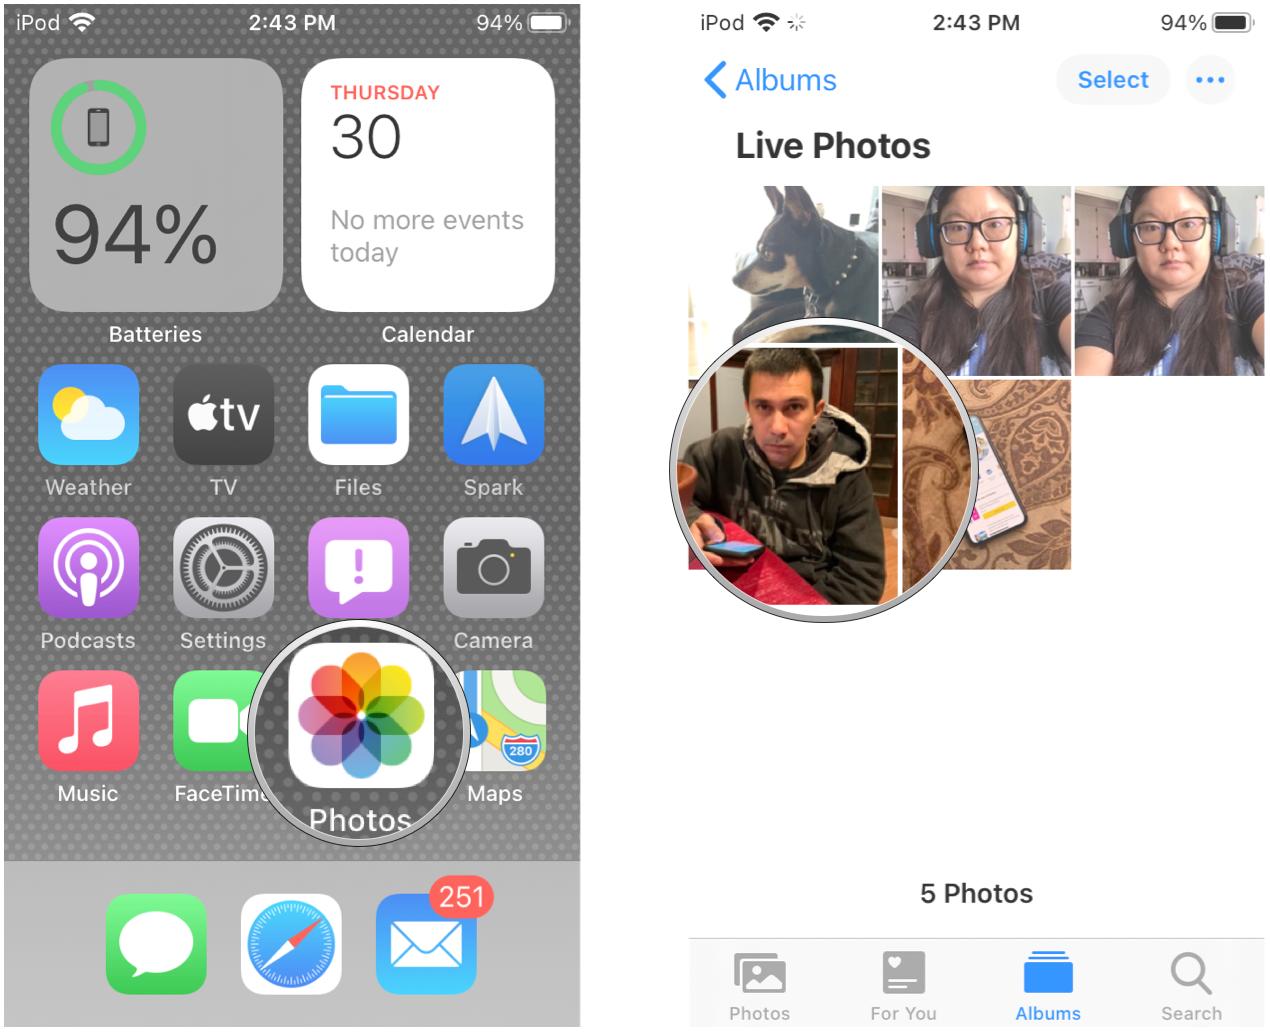
Viewing a Live Photo on one of Apple's current-generation iPhone models (iPhone 6s and later) is easy-peasy!
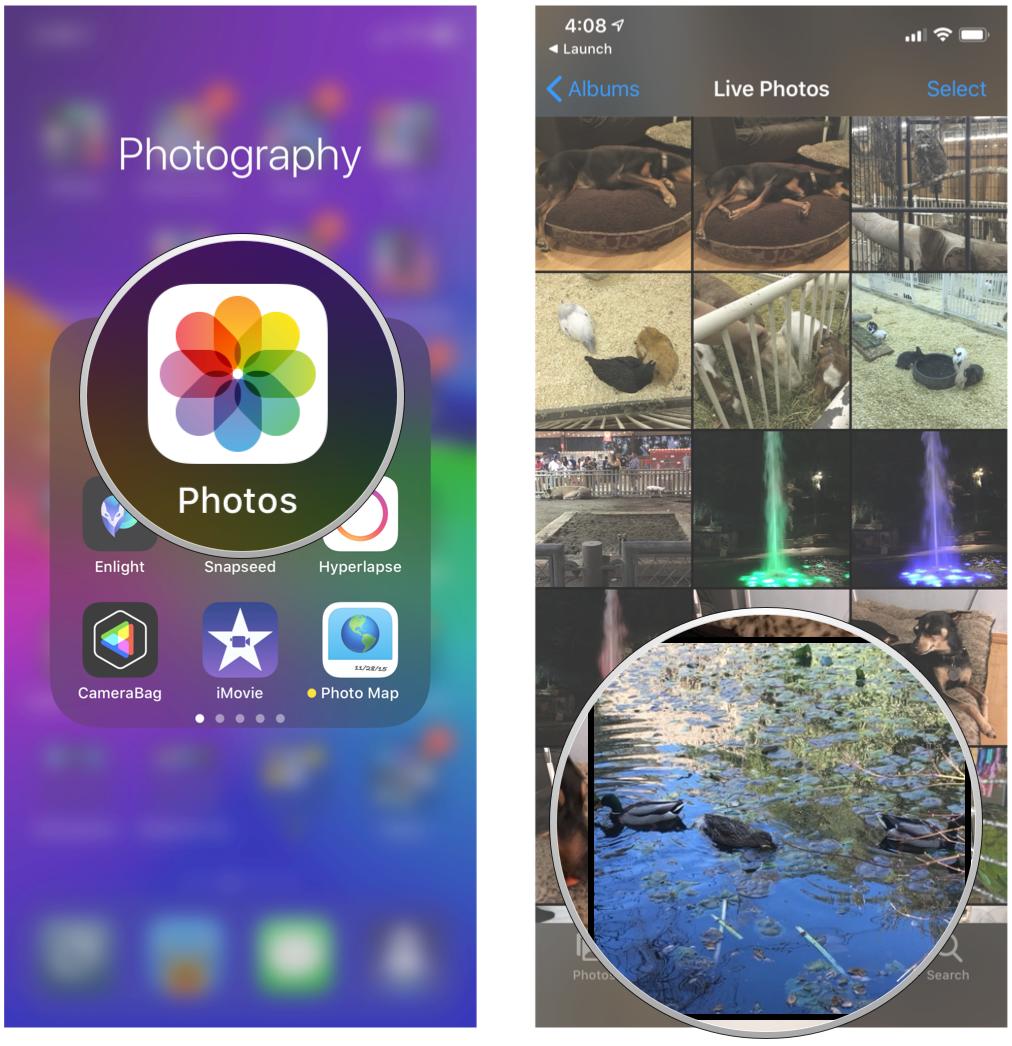
- Launch the Photos app from your Home screen.
- Find the Live Photo you want to view.
-
Press firmly on the photo to animate it.
 Source: iMore

It'll blur for just a second and then start to play.
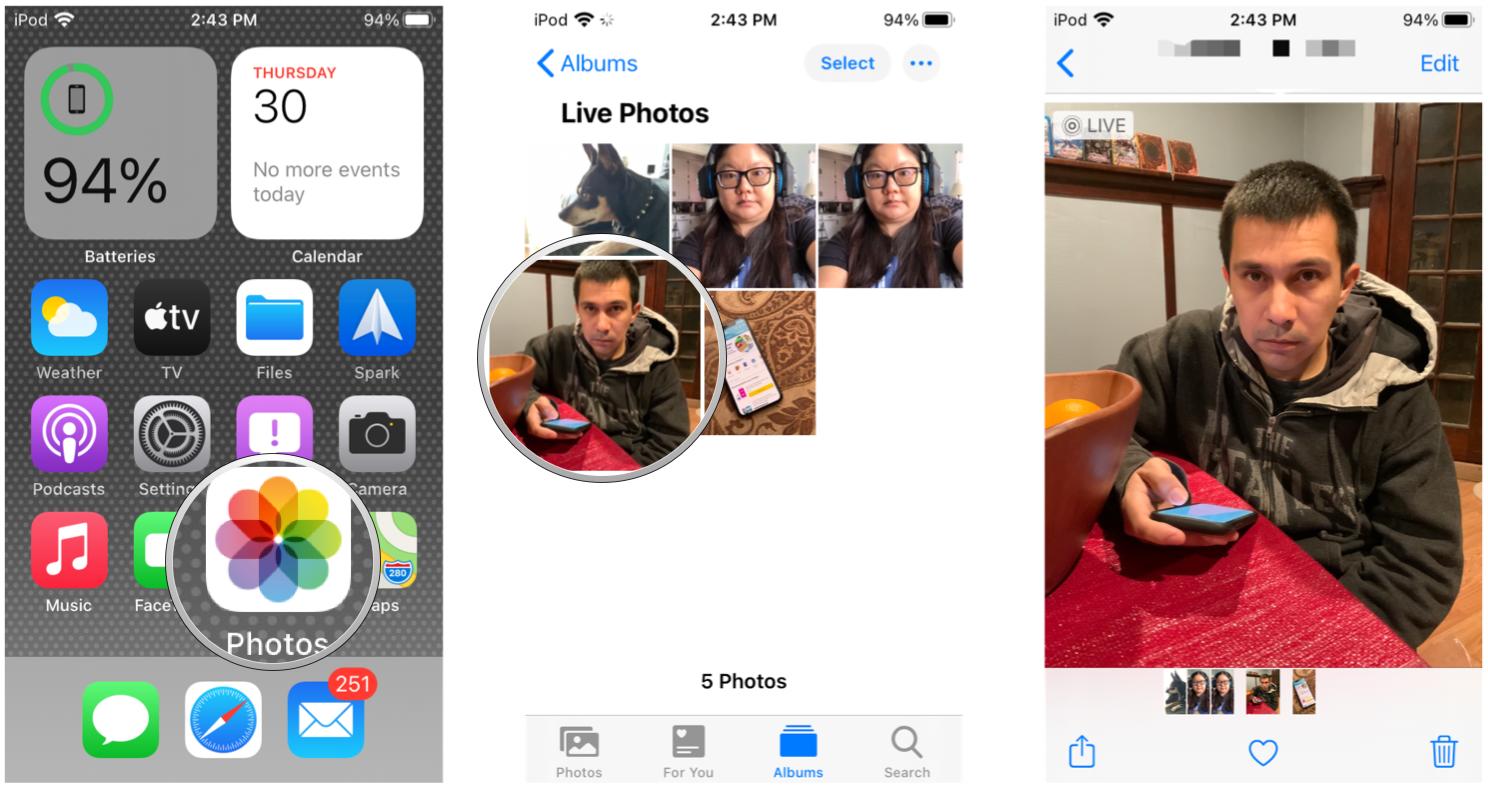
How to view Live Photos on an older iPhone, iPad, or iPod touch
If someone who can take a Live Photo sends or shares one with you, as long as you have an iPhone or iPad — even an older one that can run iOS 9 or later — you can still watch it come to life.
- Launch the Photos app on your iPhone, iPad, or iPod touch.
- Find the Live Photo you want to view.
-
Touch and hold the photo to animate it.
 Source: iMore

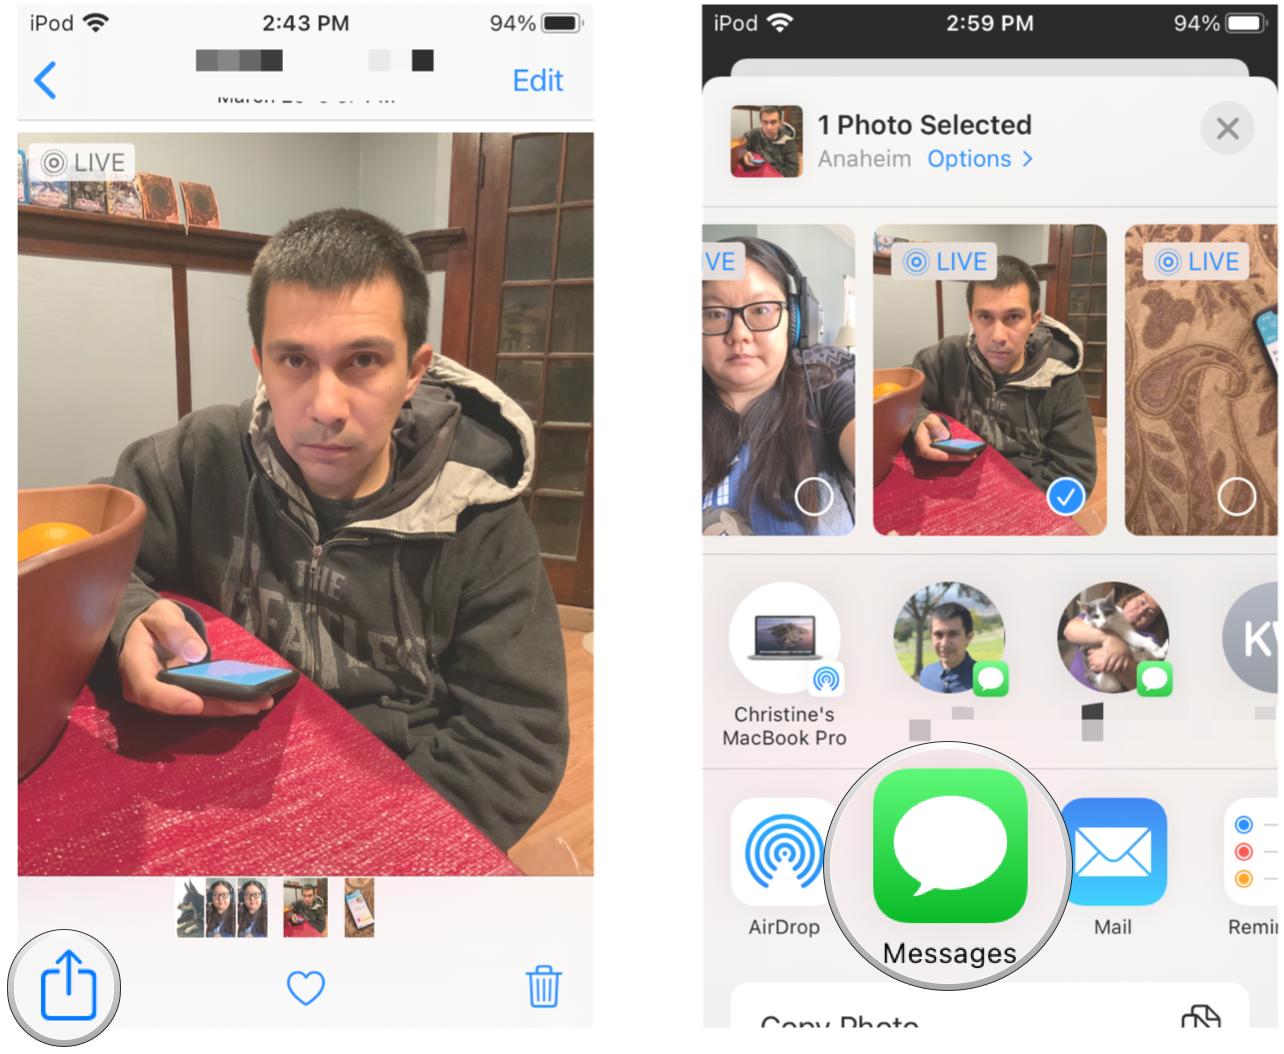
How to share Live Photos on your iPhone or iPad
You can share your Live Photos right from the standard iOS Share sheet. Here's how!
If your social service of choice currently doesn't support Live Photos, you can use an app like Lively to convert a Live Photo into an animated GIF, or use the built-in method in Photos, which we'll get to in a minute.
![]()
Lively - Live Photo to GIF
This simple app helps you turn your Live Photos into GIFs in just a few taps.
- Launch the Photos app from your Home screen.
-
Find and tap the Live Photo you'd like to share. If a photo is a Live one, you'll see a gray "Live" indicator in the upper left of your screen.
 Source: iMore
 - Tap the Share button on the bottom left of your screen. It's a box with an upward-pointing arrow.
- Tap a sharing method. You can share to just about any social media platform, and you can even share your GIFS to YouTube.
-
Follow the on-screen prompts to share it like you normally would with the method of your choice.
 Source: iMore


How to set a Live Photo as the wallpaper
You can set Live Photos as your wallpaper on iPhone 6s or later, which works especially well for loved ones, children, pets, and landscapes.
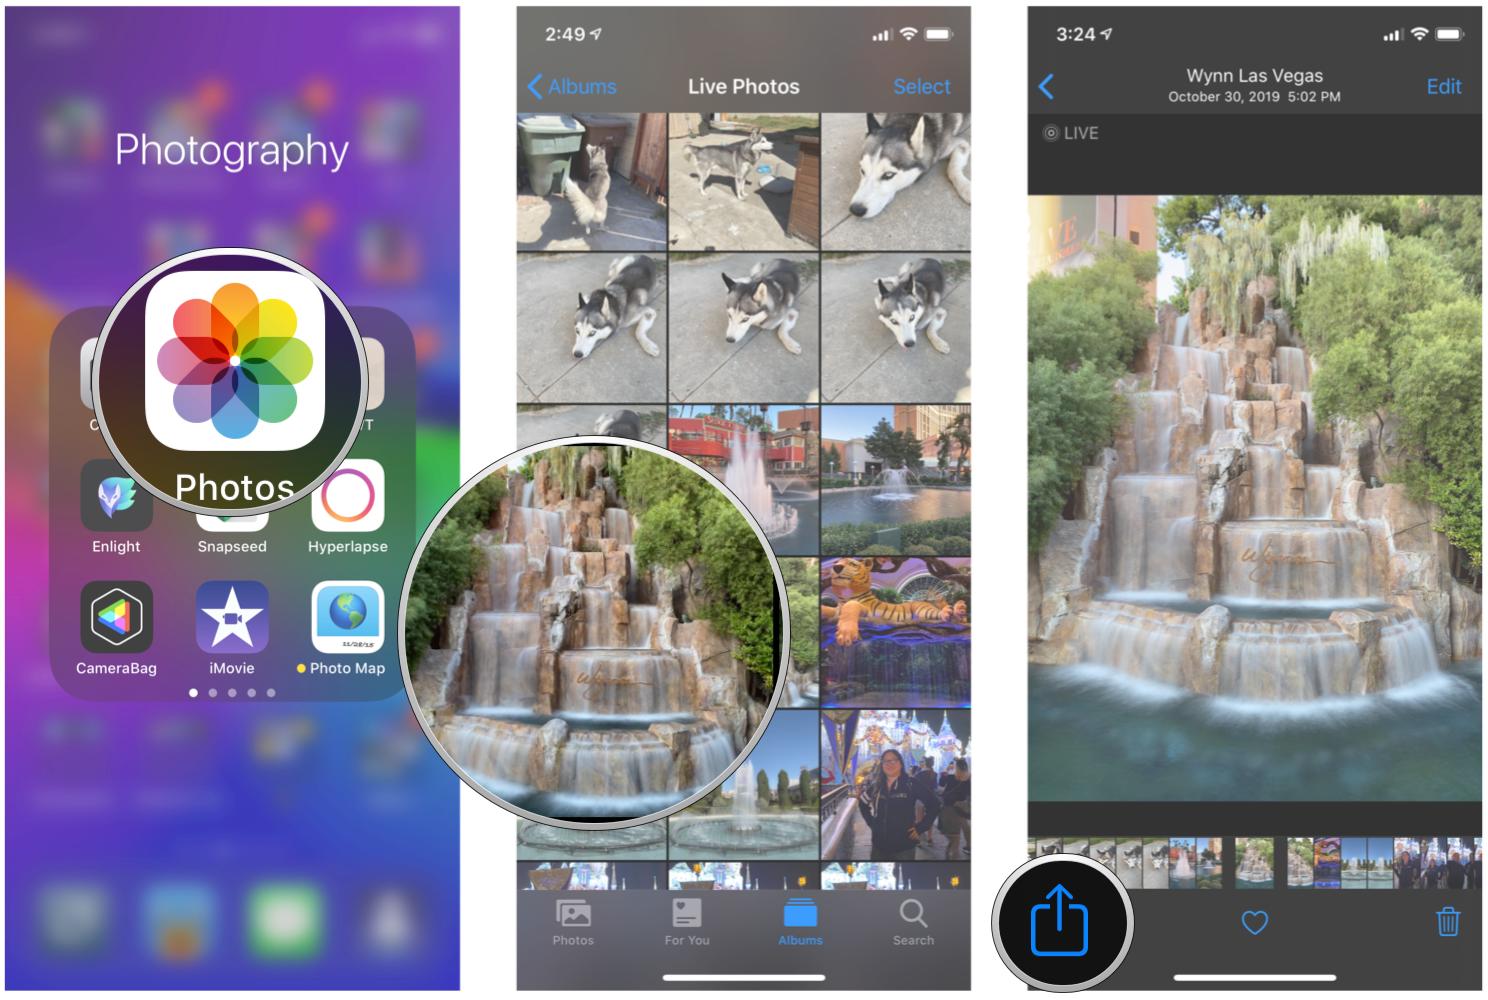
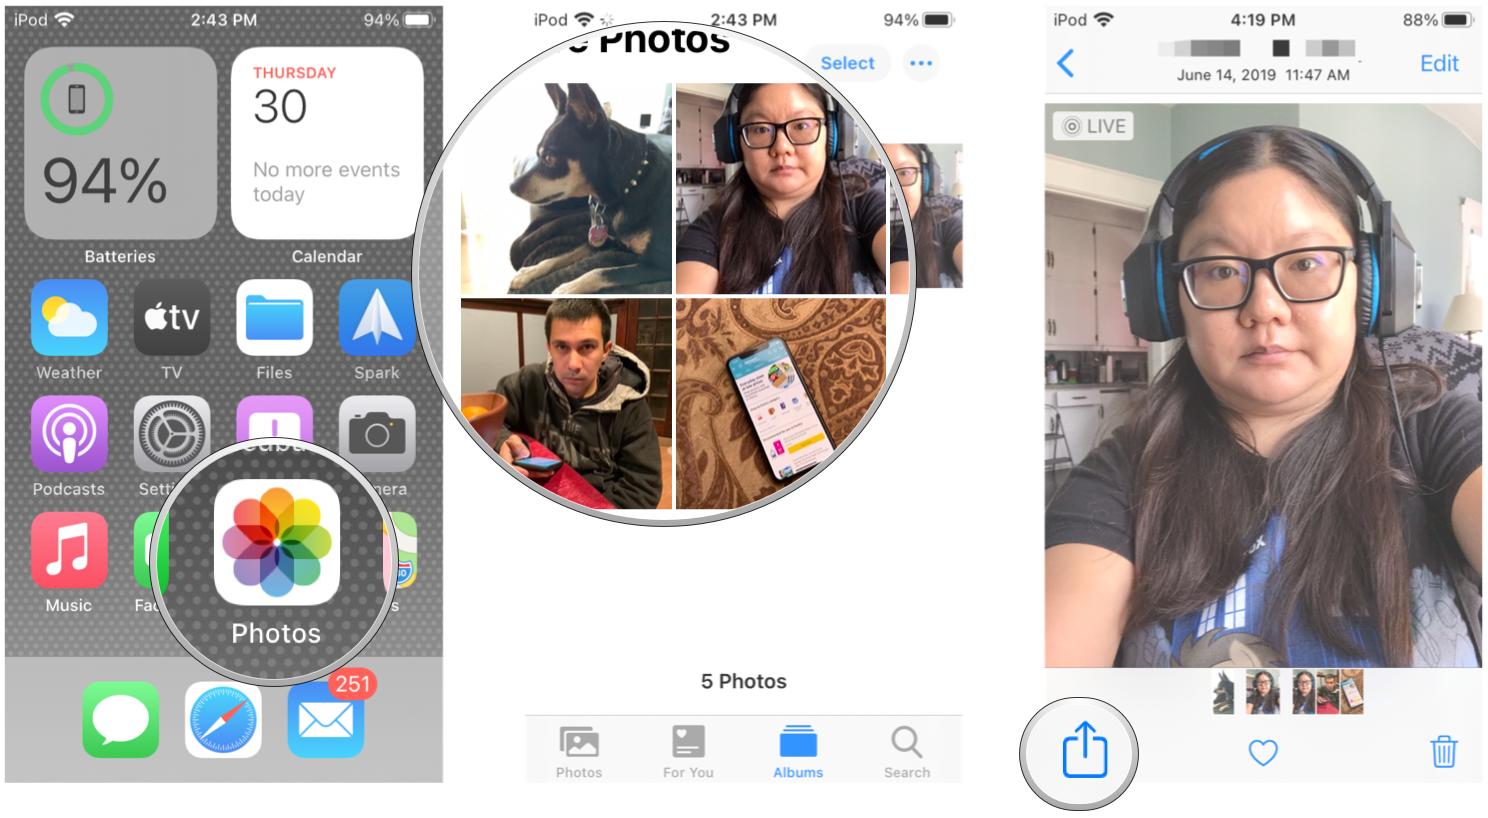
- Launch the Photos app from your Home screen.
- Find the Live Photo you want to use as your wallpaper.
-
Tap the Share button.
 Source: iMore
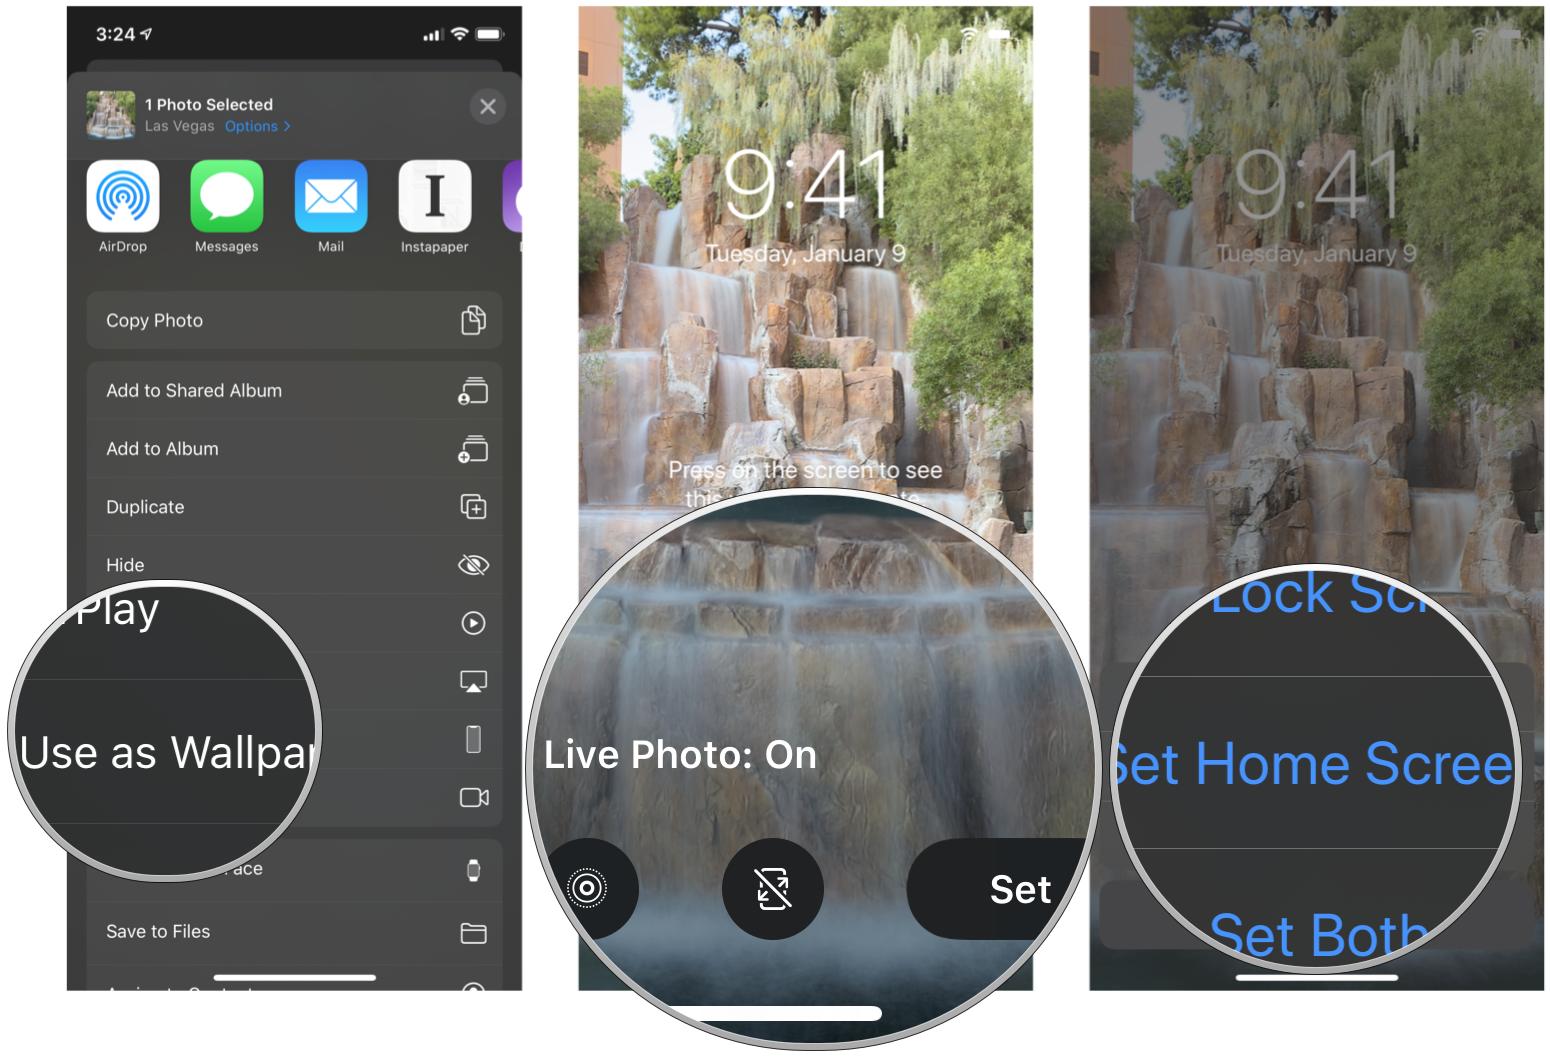
 - Tap the Use as Wallpaper button.
- Tap Live Photo on the lower right of your screen if it's not already selected.
- Tap Set. You can't adjust the size of a Live Photo wallpaper.
-
Tap Set Lock Screen, Set Home Screen, or optionally Set Both.
 Source: iMore


How to extract a still shot from a Live Photo
If you want the photo but without the fancy moving part, you can make a copy that gives you just that.
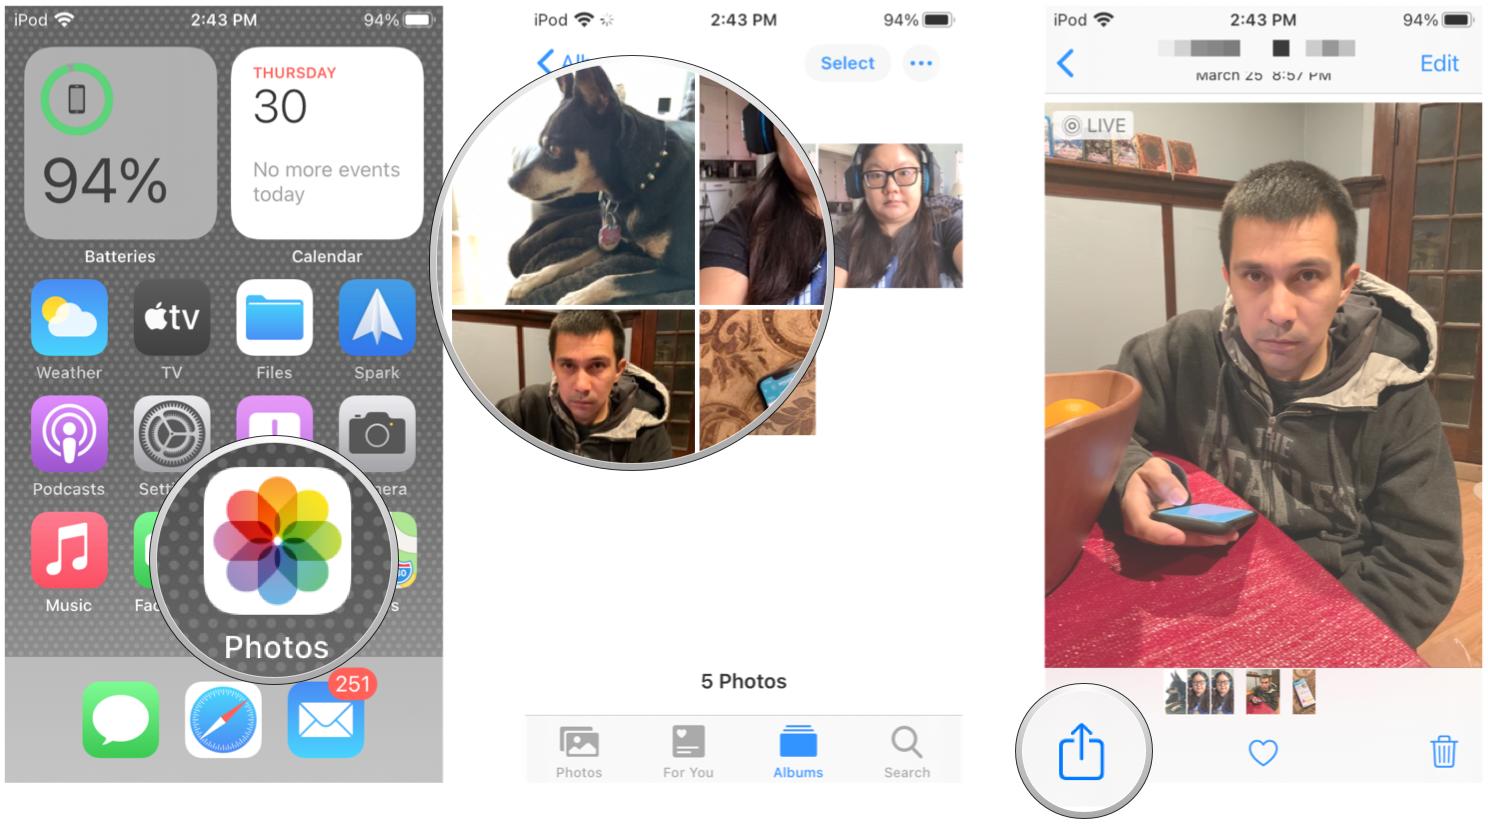
- Open the Photos app.
- Select the Live Photo you want to extract a still shot from.
-
Tap the Share icon in the bottom left corner of the screen.
 Source: iMore
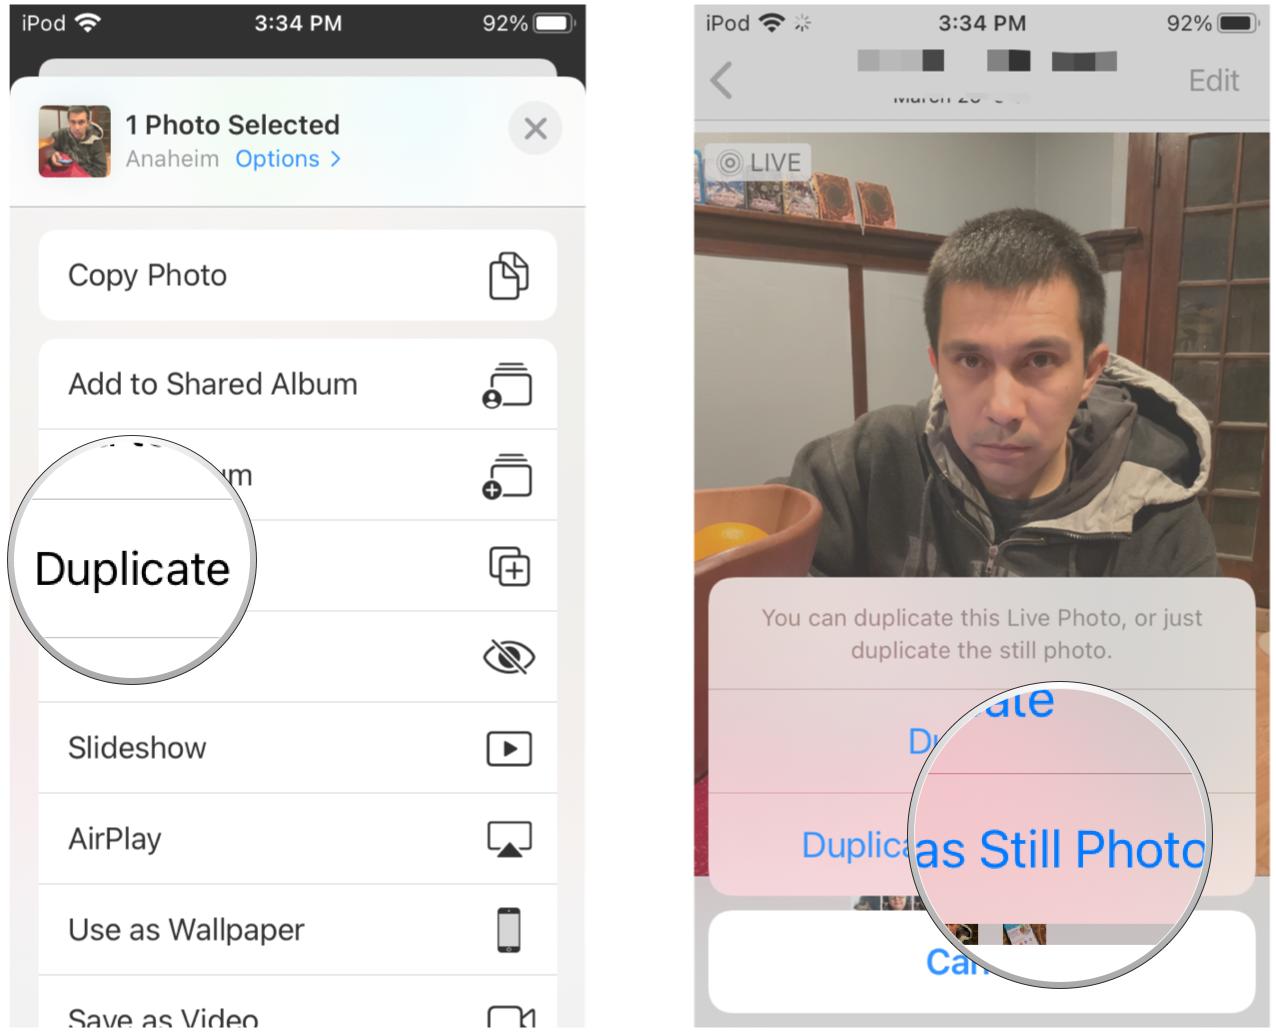
 - Tap Duplicate in the option tray at the bottom of the screen.
-
Tap Duplicate as Still Photo.
 Source: iMore


A copy of the still photo will appear in your library right next to the original Live Photo. You can delete the Live Photo if you no longer want it to take up storage on your iPhone.
How to turn a Live Photo into a GIF
There's no longer any need to connect your iPhone to your Mac and go through the rigmarole of picking a GIF creator app. You can do it all right in the Photos app!
- Launch the Photos app from your Home screen.
-
Find and tap the Live Photo you'd like to turn into a GIF.
 Source: iMore
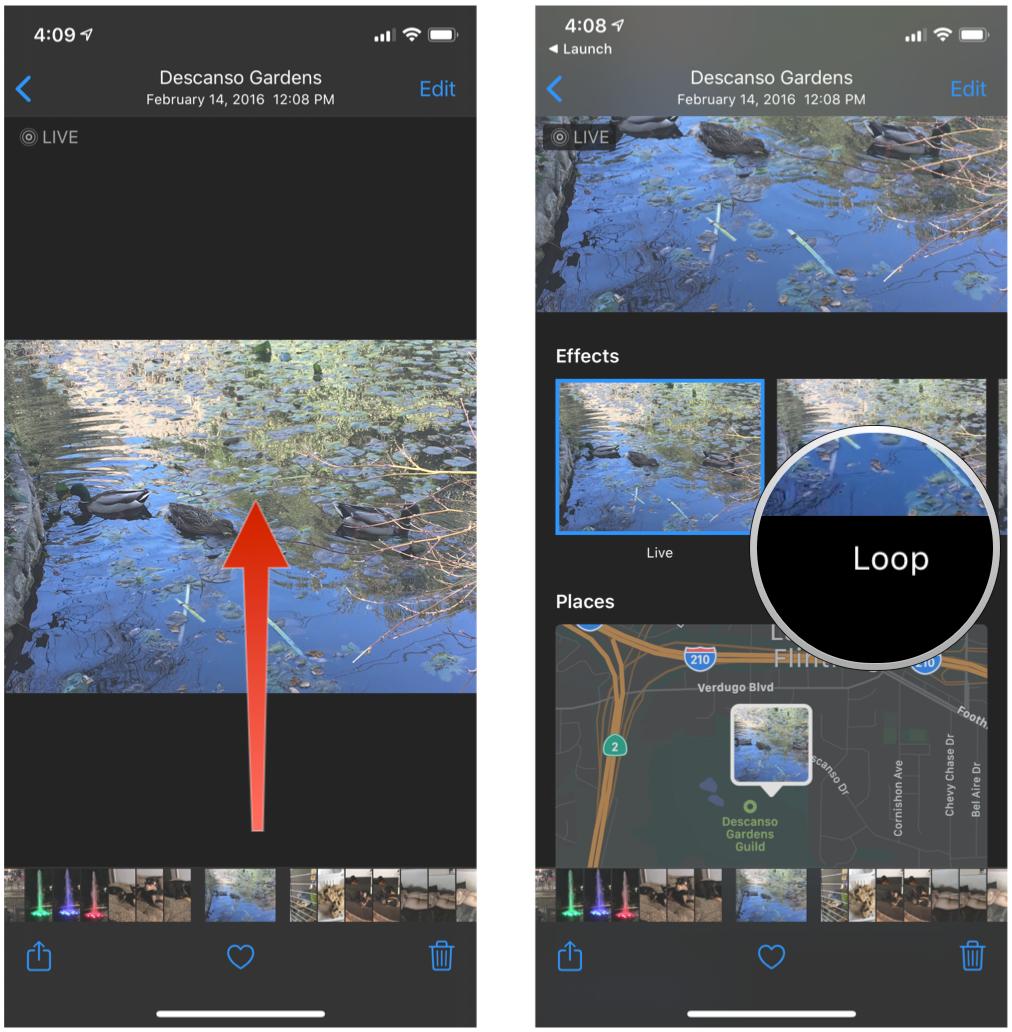
 - Swipe up on the center of the screen to reveal the animation options.
-
Tap Loop if you'd like to loop the Live Photo as a GIF. You can also choose to "Bounce" it á la the Boomerang app for Instagram, or even go with Long Exposure.
 Source: iMore


You'll then be able to find your GIF in the Animated album in the Photos app.
How to turn a Live Photo into a GIF in iOS 15
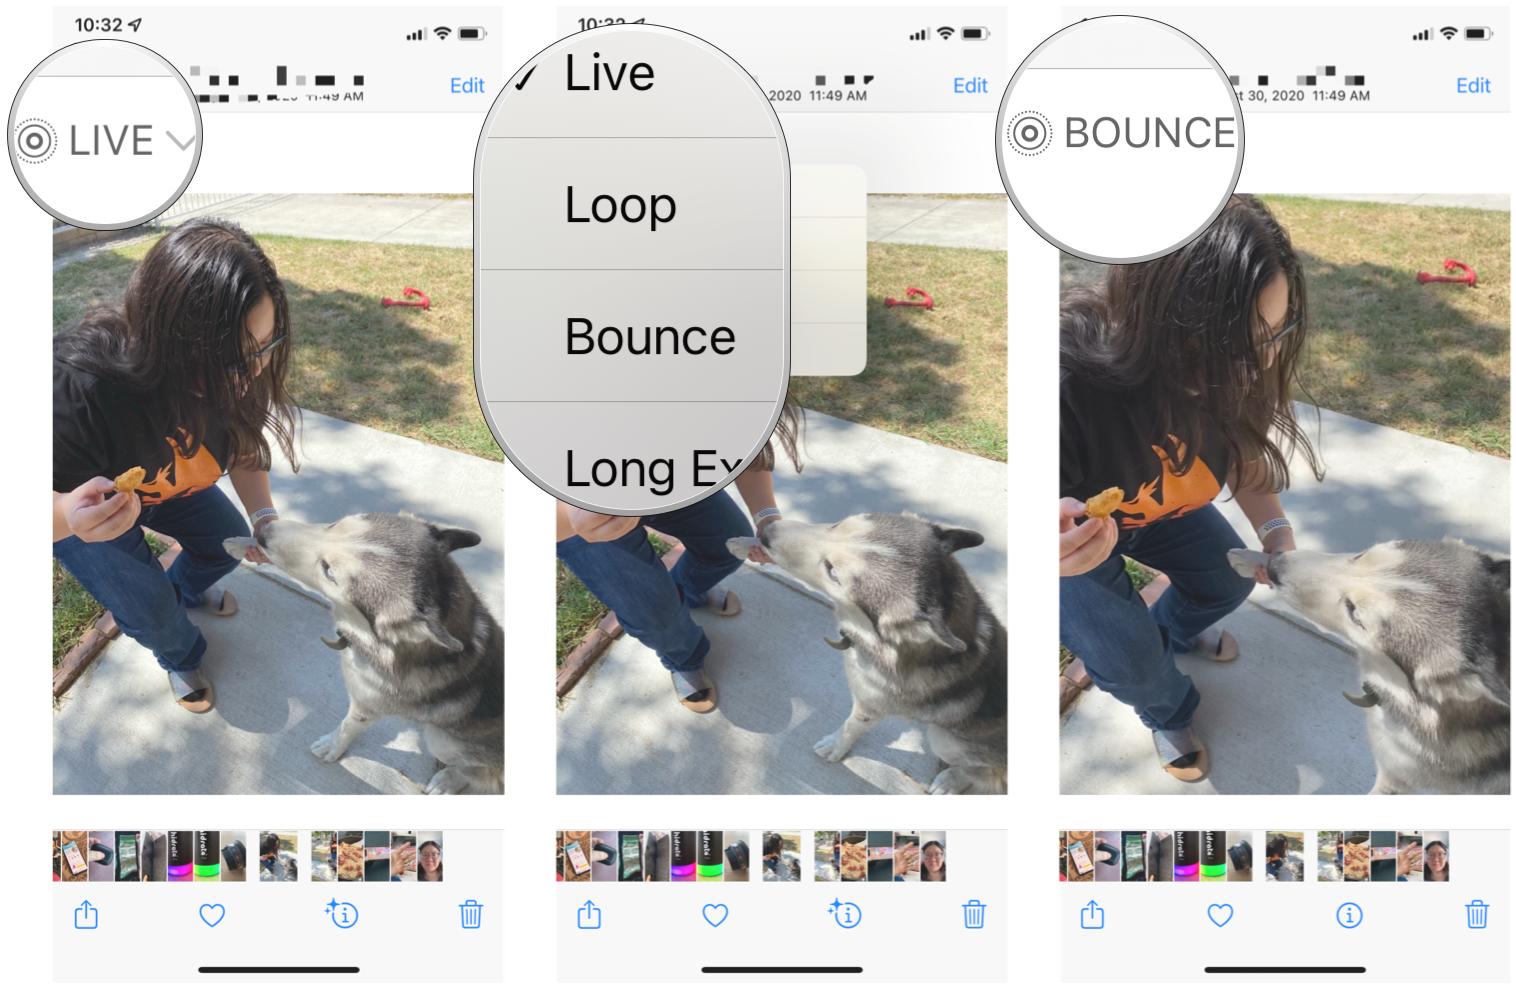
In iOS 15, Apple has tweaked the method of turning a Live Photo into a GIF. Rather than scrolling down to bring up the GIF effects, you'll now be able to access them via a contextual menu where the "Live" indicator is.
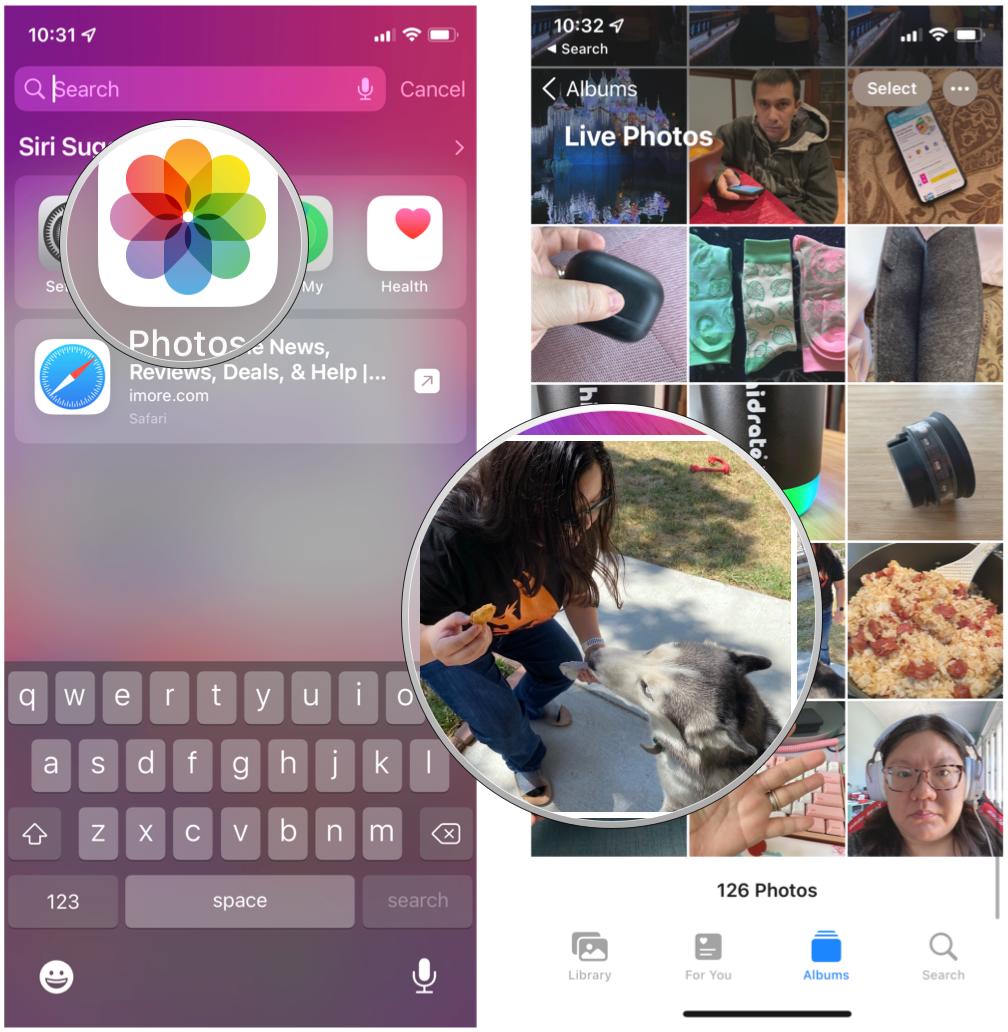
- Launch the Photos app on your iPhone or iPad.
-
Find the Live Photo that you want to turn into a GIF.
 Source: iMore
 - Tap the Live indicator in the upper left corner.
-
Choose which GIF effect you want: Loop, Bounce, or Long Exposure.
 Source: iMore


When you change a Live Photo into a GIF with either the Loop or Bounce effect, it will go into your Animated album instead of Live Photos. You can change it back to a Live Photo at any time. Images with the Long Exposure effect are still counted as Live Photos.
How to stitch together multiple Live Photos to create a video
In iOS 13, Apple added the ability to stitch together multiple Live Photos (not necessary to have them back-to-back) to create a video clip. The process is baked directly into iOS itself, so you don't need to import your Live Photos into an app like iMovie to do so. It's insanely easy and lets you create amazing memories! Here's how to make a video from multiple Live Photos.
- Launch Photos on your iPhone or iPad.
-
Find the Live Photos that you want to create a video file with.
- When viewing an image, you can tell if it is a Live Photo when it has the diffusing circle icon in the top left, along with the word "LIVE" next to it.
 Source: iMore
 - Tap on the Share button.
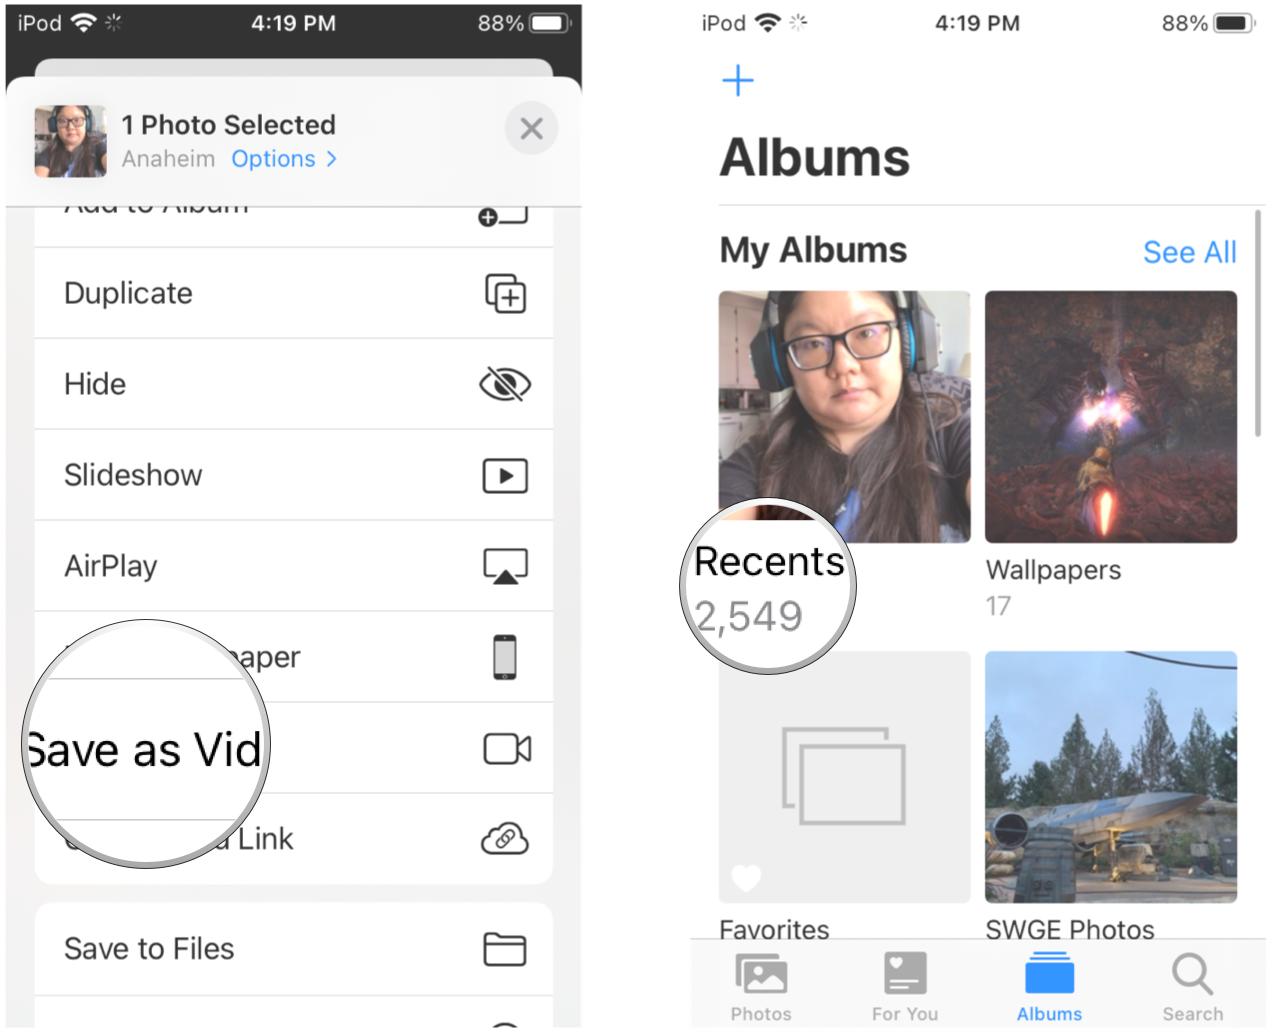
- You can scroll through your images and select more just above the Share Sheet options.
- Scroll down and select Save as Video.
-
Your new video will be in the Recents album.
 Source: iMore


Questions about Live Photos?
As you can see, it's easy to create magical moments with Live Photos on your iPhone or iPad, even if you aren't using the latest and greatest. It's a fun feature that definitely makes your photos come to life, and there's so much you can do with them. If you have any questions about Live Photos for iPhone and iPad, let us know in the comments and we'll help you out.
Updated July 2021: Updated for iOS 14 and the latest versions of the iOS 15 betas.
We may earn a commission for purchases using our links. Learn more.

Vibrant visuals
Review: Nintendo Switch OLED's screen is breathtaking
The Nintendo Switch OLED is one of the hottest consoles this year, offering a number of improvements over previous Switch versions and is an excellent family system. But is it worth the $350 asking price?
Source: https://www.imore.com/live-photos
Posted by: melbourneardiattle.blogspot.com
0 Response to "How To Make A Live Photo Your Wallpaper"
Post a Comment